Table of Content
Comb each ponytail well before cutting them, getting a straight line in each and every cut, which will be in a V when we let go of the ponytails. You just have to wet all the hair, put the head down, and comb it well to make a ponytail as high as possible and stretched. The ponytail should be above the forehead, at the crown of the head, straighten the hair so that it is polished in the ponytail, and secure it with a rubber band tightly. The scissors must be very sharp, and as far as possible, be to cut the hair. It is done leaving the rear area much shorter, gaining in length as we get closer to the face. If you want to cut choppy layers in long hair at home, you will need a pair of scissors, a comb, and a hair dryer.
Of course, you don’t have to stick to these guidelines exactly. Feel free to experiment until you find the angle that works best for you. Just be sure to pay attention to how the angle of your layers affects the overall look of your hair, and make adjustments as needed. Starting at the nape of the neck, take a thin slice of hair and cut it straight across. Starting at the nape of your neck, use sharp scissors to cut into the hair at a 45-degree angle.
What angle should I cut my hair for layers?
Starting at the front of your head, insert a segment of hair surrounding the stationary guide and the stationary guide between your middle and forefinger. Repeat this process, working from front to back down the center of your head. Gather a small segment of hair at the front left side and the front right side. Insert the 2 segments between your middle and forefinger and pull them forward at a 90° angle. Stop your fingers at the end of the left segment. Trim the excess hair from the right segment.

As you stand up straight, try not to shift your hair or the position of your hand. Using a pair of sharp shears, cut just below the rubber band. Set down the hair you cut off, remove the ponytail holder, and assess your layered look. If you want to cut more hair off, repeat the process.After you remove the ponytail holder, make sure to check you layers for evenness. If you notice any areas that are uneven, use a pair of scissors to clean them up.
How do you layer your own hair long?
To cut long layers, start by dampening your hair and detangling it with a fine-tooth comb. Then, divide your hair into 4 even sections using clips so you have 1 section on top, 2 on the sides, and 1 at the base of your head. Next, unclip the top section and trim 1-2 inches off of it, working with one small segment at a time. When you finish the top, unclip the sides and cut 1-2 inches off of them. Finally, unclip the last section of your hair and trim off 1-2 inches to finish your layers.
By point cutting directly into a single spot, we can achieve a little separation in our layers. Getting a perfectly even DIY cut can be tricky, but this tried-and-true method for achieving layers at home is great for beginners. Smooth hair into a ponytail at the top of the hairline near the forehead (hence the "unicorn ponytail" method), pull hair forward and snip ends. The sharper the angle, the more drastic the face-framing layers will be. Once you've finished cutting all of your hair evenly to one length, you can add layers. Cut in small sections, moving left to right.
Act 3: Cutting Face Framing Layers Made Easy
Undo the ponytail, and look at the result with your hair loose. If you want to get a shorter length of hair, you just have to repeat the process with damp and well-groomed hair, until you achieve the special cut you need. Finally, move on to the front hair and all you will have to do is make new parts to cut these back to layers.

Once your hair is curled, use a comb to comb out the curls. But speaking as a stylist, I can confidently say that cutting your own face-framing layers is easy-to-achieve and can give your haircut a huge boost . Keep reading for our 10-step guide on how to cut the perfect face-framing layers at home. This hack to cut layered hair has never failed us and looks good on most face shapes too.
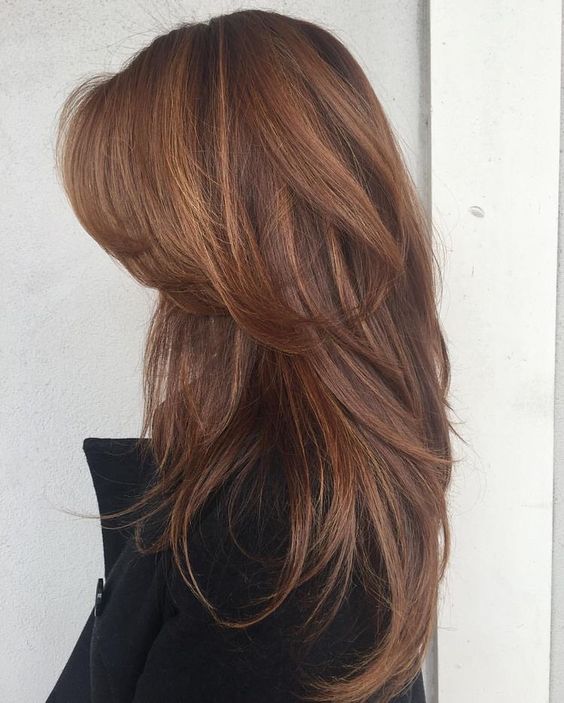
The initiative is similar to that of the traditional bob, with a few exceptions. Being a little longer, since this version reaches the middle of the neck, we have the possibility of marking more subtle layers. If, in addition to this, we give it a rounded shape as we move to the rear area, we will achieve that it sweetens the features.
Gather your hair into a ponytail at the base of your forehead. Secure it tightly with a rubber band.Imagine that you are transforming your hair into a unicorn’s horn. The ponytail should be located in the same place as a unicorn’s horn. Shampoo and condition your hair prior to cutting your locks. Squeeze the excess water from your tresses.
Hold the ends of your hair firmly between two fingers and cut straight across. Make sure the scrunchie is made from a slick fabric, something that grabs the hair will make this tricky. Also make sure you're using the right scissors - scissors that you'd use for cutting random things around the house are not ideal. You can get some nice hair scissors for $10-15 at any drugstore.
Slide cutting is a very gentle approach that enables flexibility and less room for error. By keeping your shears open and making delicate pulses—never fully closing your shears together - let your shears glide their way down the front of the hair. Remember you are not cutting into the hair at all. It's all about going straight down from your guide. Dull edges on household scissors could potentially give you even more split ends (plus, ew, cross-contamination).
Send commentI have read and accept the privacy policyRed Link To Media collects personal data for internal use only. In no case will your data be transferred to third parties without your authorization. If you’re having trouble pulling the ponytail all the way, section it off with hair ties so it stays in place.

Before starting, look at yourself in the mirror and decide what kind of change are you looking for. Do you want to be able to trim your own hair, here and there, in between going to the hair salon? Do you just want to be able to ditch your hairdresser altogether and save some money? In this post we focus on what you need tp be able to master this art altogether and become a DIY haircut god. Don't get upset — just fix them as you find them.
You can see in the video the front bits are shorter and what’s going to fall in the back is longer. Truth is, while we all might like to think we can turn in our lifetime salon membership card, cutting your own hair isn’t for everyone. Starting from the back, take a thin slice of hair and cut it straight across. There is no one definitive answer to this question as everyone’s hair is different, but here is a guide on how to cut your own hair in a shaggy layer style.

You can either cut the hair dry or wet, but it is usually easier to cut the hair wet. Once you’ve decided where to add layers, use a comb to section off your hair and start cutting. If you’re cutting layers around the face, start at the front of your hair and cut towards the back. If you’re cutting layers in the back, start at the bottom of your hair and cut towards the top.


No comments:
Post a Comment